
How to Create a Bootable USB Without Software Step-by-Step Guide
So you need a bootable USB drive but don’t want to install yet another tool on your computer? Good news you actually don’t need to. Whether you’re reinstalling Windows, setting up Linux, or fixing a broken system, you can create a bootable USB without software using tools already built into your operating system.
In this guide, we’ll walk through everything simply, clearly, and without the technical jargon. Let’s get started.
What Is a Bootable USB Drive?
A bootable USB is a flash drive that your computer can start (or “boot”) from, instead of from its internal hard drive. It contains a full operating system or installer think of it like a portable version of Windows or Linux in your pocket.
Normally, people use third-party apps like Rufus or Etcher to create these. But Windows and macOS both come with built-in command-line tools that can do the same thing for free, with no installation required.
What You’ll Need Before You Start
Don’t worry, the list is short:
- A USB drive (at least 8 GB for Windows; 4 GB may work for some Linux distros)
- A downloaded ISO file of the operating system you want to install
- A Windows or macOS computer
- Admin/administrator access on your computer
- About 15–30 minutes of your time
Important: Creating a bootable USB will erase everything on the drive. Back up any files on your USB before you continue.
Method 1: Create a Bootable USB on Windows (Using Command Prompt)
Windows has a built-in tool called diskpart it’s a disk management utility that’s been around for years and works like a charm. Here’s how to use it:
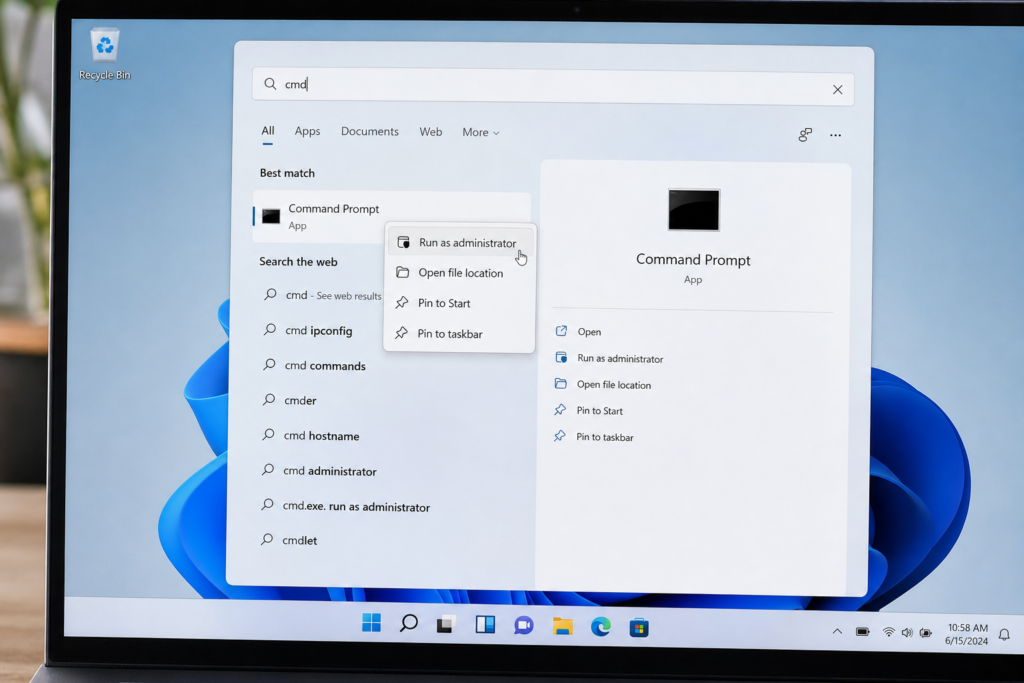
1.Open Command Prompt as Administrator
Press the Windows key, type cmd, right-click on “Command Prompt,” and select Run as administrator. Click Yes on the confirmation popup.
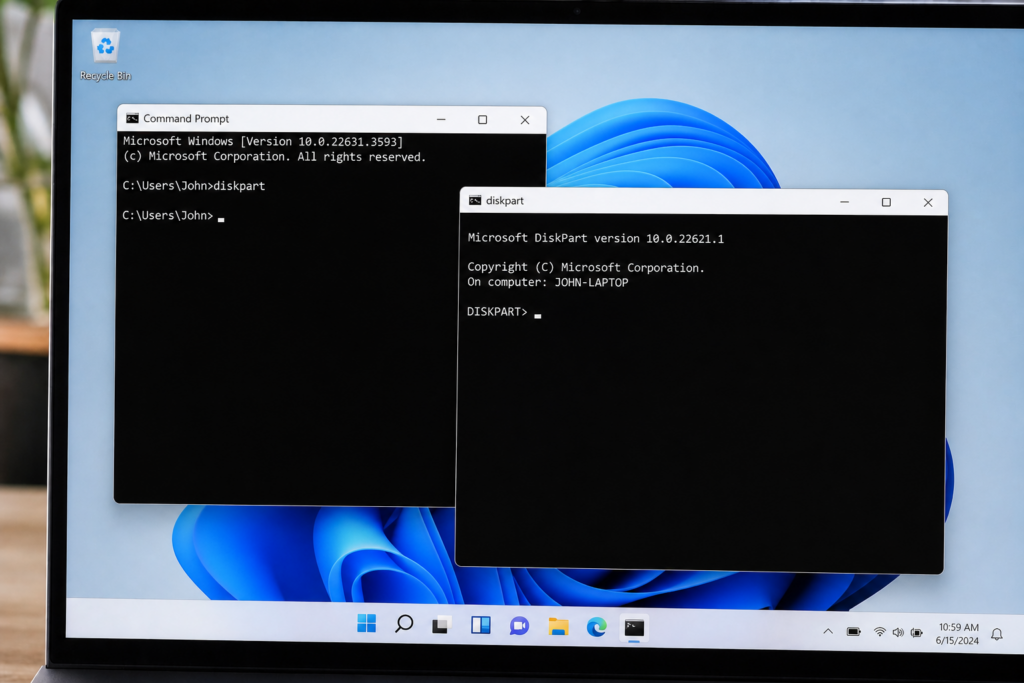
2.Launch Diskpart
In the Command Prompt window, type the following and press Enter:
diskpart
A new window will open — this is the diskpart utility ready to take your commands.
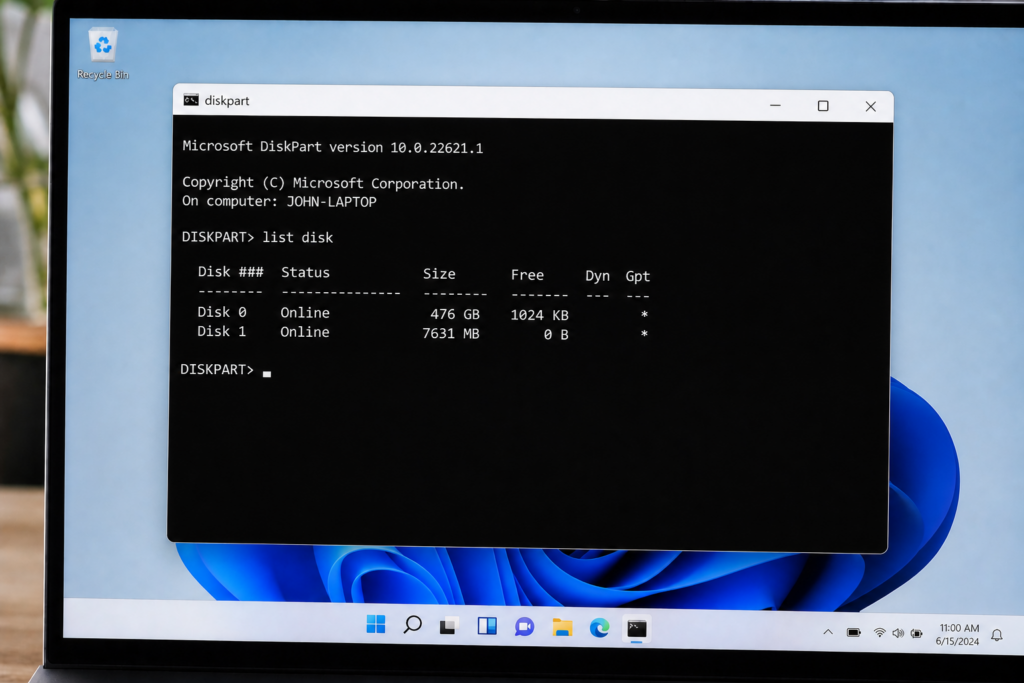
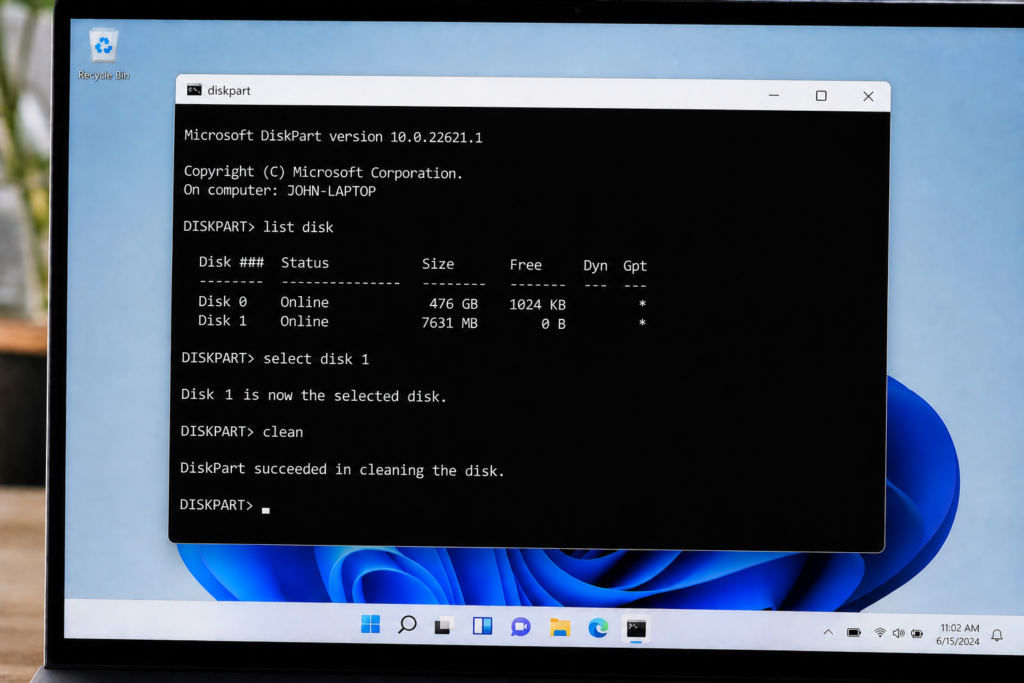
3.List All Connected Disks
Type the command below and press Enter:
list disk
This shows all disks connected to your PC. Your USB drive will appear as one of the disks — usually with a smaller size (e.g., 8 GB or 16 GB). Note the disk number carefully.
4.Select and Clean Your USB Drive
Replace X with your USB disk number from the list above:
select disk X
Then type:
clean
This wipes all existing data and partition info from the USB drive.
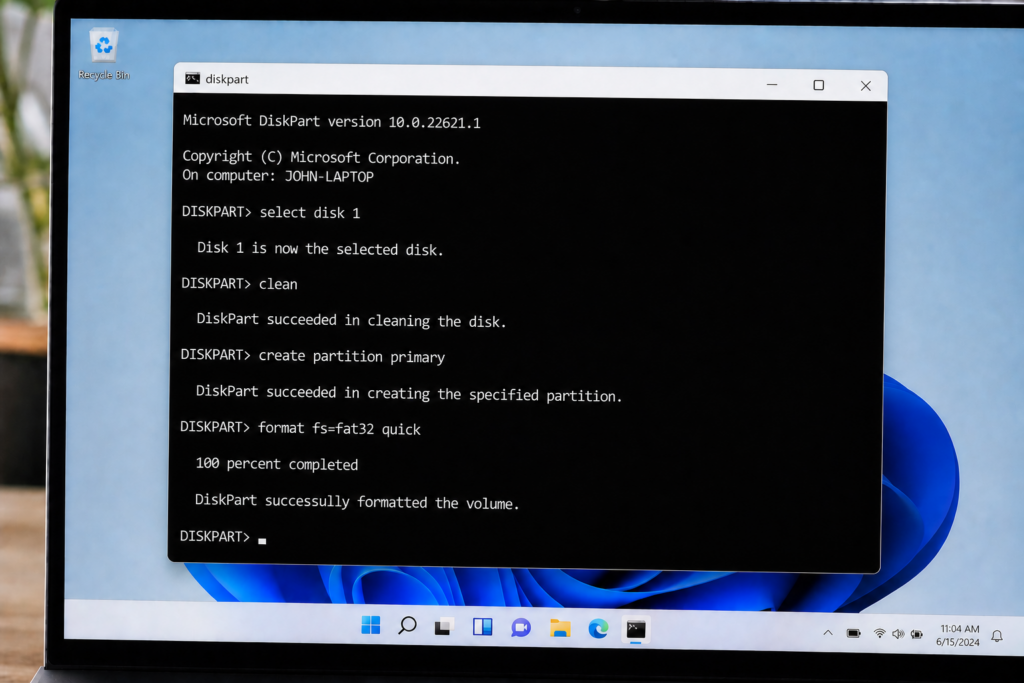
5Create a New Partition and Format It
Run these commands one at a time, pressing Enter after each:
create partition primary
select partition 1
active
format fs=fat32 quick
assign
exit
Your USB drive is now formatted and ready to receive the OS files.
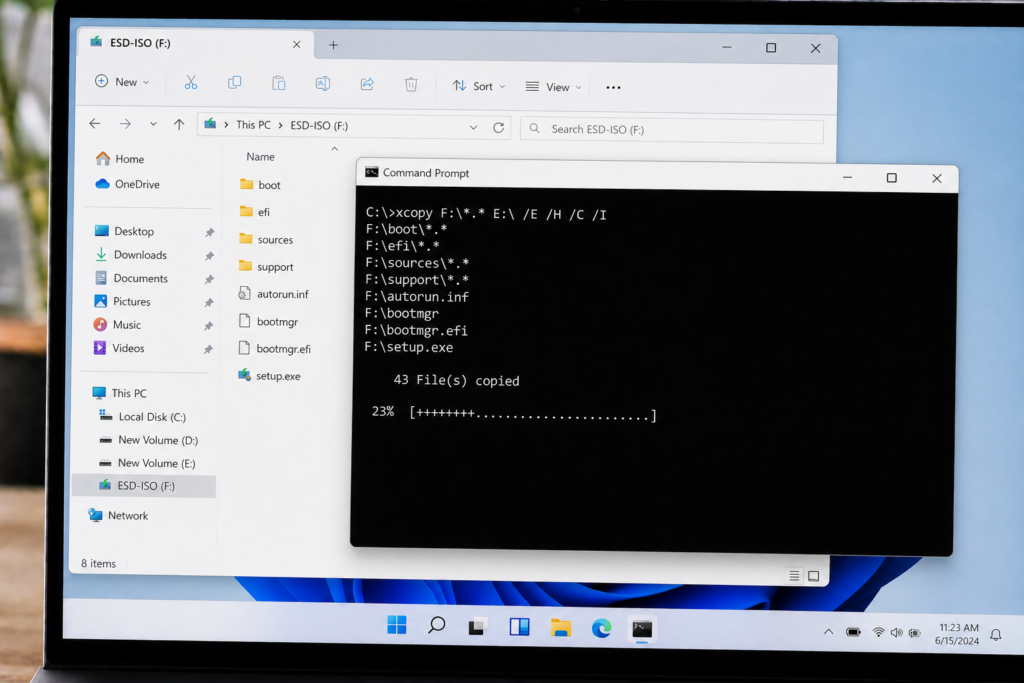
6.Mount the ISO File and Copy Files to USB
Right-click your downloaded ISO file in File Explorer and select Mount. Windows will give it a drive letter (e.g., D:). Then go back to Command Prompt (as admin) and type:
xcopy D:\*.* /s /e /f E:\
Replace D: with your ISO drive letter and E: with your USB drive letter. This copies all files from the ISO to your USB.
That’s it! Your bootable USB is ready. Plug it into any PC and restart — enter your BIOS boot menu (usually F12 or Delete at startup) and select the USB drive to boot from.
Method 2: Create a Bootable USB on macOS (Using Terminal)
Mac users can use the built-in dd command — a powerful disk utility that copies data byte by byte. It’s fast and doesn’t need any extras.
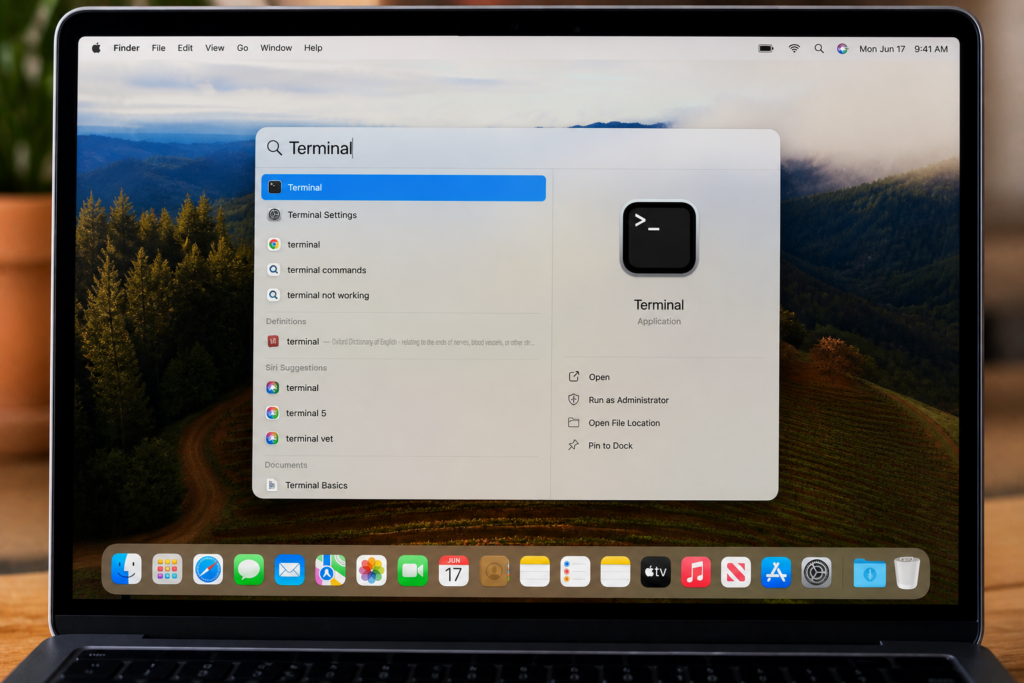
1.Open Terminal
Press Cmd + Space, type Terminal, and press Enter to open it.
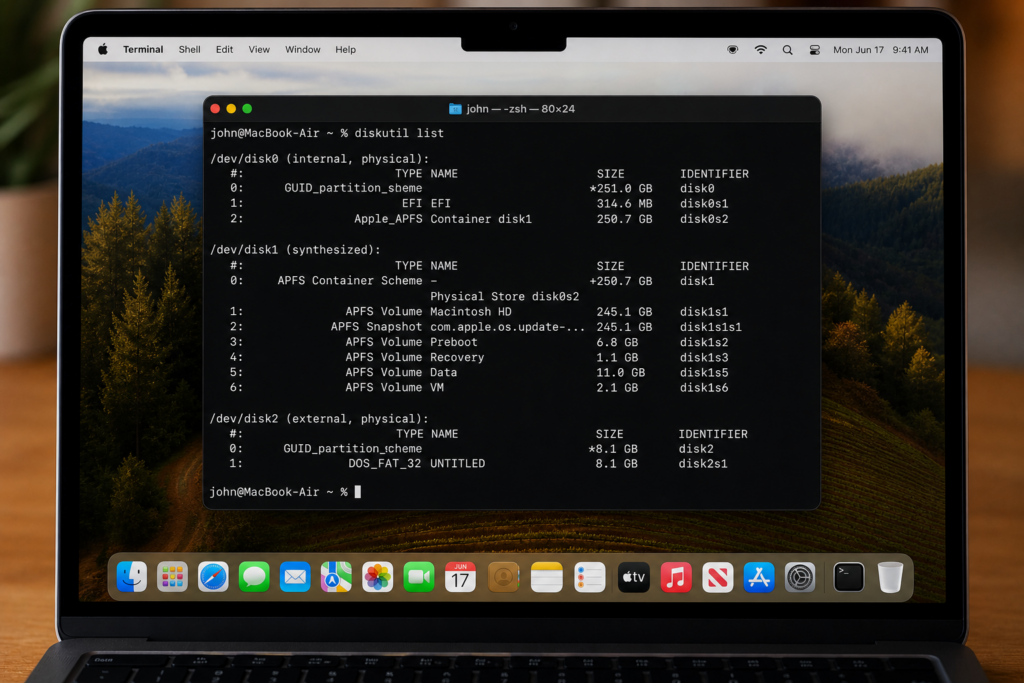
2.Find Your USB Drive Identifier
Type this command and press Enter:
diskutil list
Look for your USB drive by its size (e.g., 8 GB or 16 GB). It will show as something like /dev/disk2. Note that identifier.
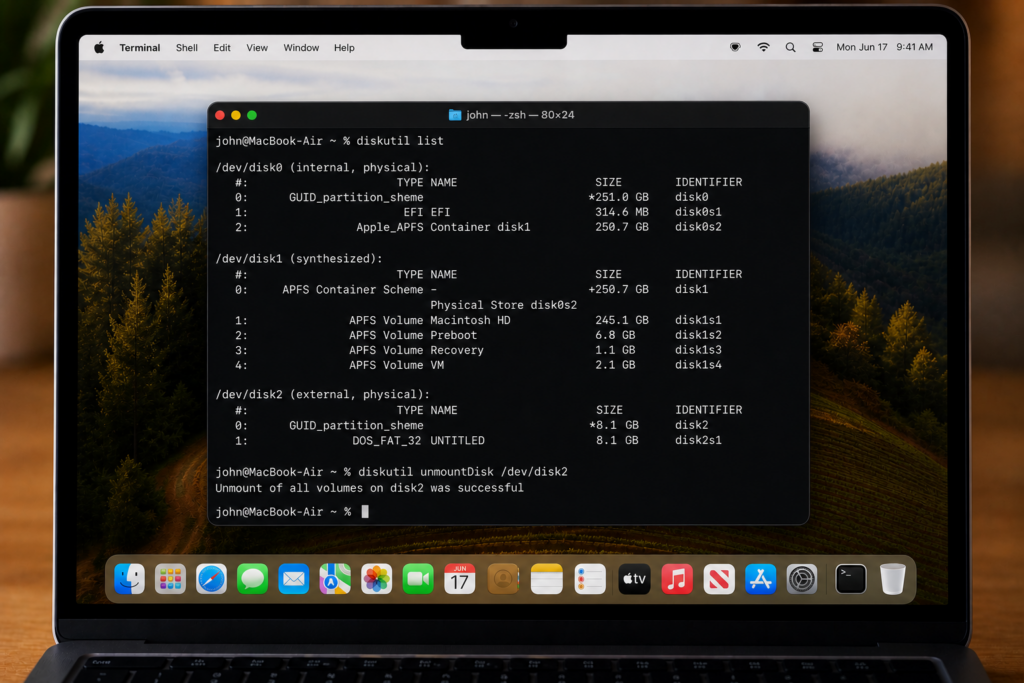
3.Unmount the USB Drive
Replace diskX with your USB’s identifier:
diskutil unmountDisk /dev/diskX
This unmounts the drive so you can write to it directly.

4.Write the ISO to the USB Drive
Use this command, replacing the path and disk identifier accordingly:
sudo dd if=/path/to/your.iso of=/dev/rdiskX bs=4m status=progress
This will take several minutes. The terminal won’t show much — just let it run until it finishes.
Once complete, type diskutil eject /dev/diskX to safely eject the USB. It’s ready to use!
Common Errors and How to Fix Them
| Error | Likely Cause | Fix |
|---|---|---|
| “Access Denied” | Not running as admin | Right-click CMD → Run as Administrator |
| USB not showing in diskpart | USB not connected properly | Remove and re-insert USB, then run list disk again |
| ISO mount fails | Corrupted ISO file | Re-download the ISO from the official source |
| PC won’t boot from USB | Secure Boot or wrong boot mode | Disable Secure Boot or switch from UEFI to Legacy in BIOS |
| dd command hangs on Mac | Drive not properly unmounted | Use rdisk instead of disk (e.g., /dev/rdisk2) |
Tips for Beginners
Always download ISO files from official sources — like microsoft.com or ubuntu.com. Unofficial sources may have corrupted or unsafe files.
- Always double-check your disk number in diskpart before running
clean— selecting the wrong disk can wipe important data. - Use a USB 3.0 drive if possible — it’s much faster than USB 2.0 for writing large files.
- If FAT32 format fails for Windows (files over 4 GB), use
format fs=ntfs quickinstead. - Keep your USB plugged in during the whole process — removing it midway will cause errors.
- After creating the bootable USB, test it on your PC before needing it in an emergency.
Conclusion
Creating a bootable USB without software is easier than most people think. Both Windows and macOS come with powerful built-in tools — diskpart + xcopy on Windows and dd on Mac — that let you do everything without installing a single extra app.
Whether you’re setting up a new PC, rescuing a broken system, or just learning how things work, this skill is genuinely useful. Follow the steps above carefully, double-check your disk numbers, and you’ll have a working bootable USB in under 30 minutes. You’ve got this!
Frequently Asked Questions
Can I create a bootable USB without any software on Windows 11?
Yes. Windows 11 includes Command Prompt with diskpart and xcopy — both are built-in tools that let you create a bootable USB without downloading anything extra.
Is it safe to use the diskpart “clean” command?
Yes — but only if you’ve selected the correct disk (your USB drive). The clean command permanently erases all data on the selected disk, so make sure your USB is selected, not your hard drive.
What size USB drive do I need to create a bootable USB?
At least 8 GB is recommended for Windows. Some Linux distributions like Ubuntu will work on 4 GB, but 8 GB is a safer choice for most use cases.
Why won’t my PC boot from the USB after I create it?
The most common reasons are Secure Boot being enabled in BIOS or the boot mode being set to UEFI while the USB was made for Legacy. Enter your BIOS settings (usually by pressing F2 or Delete on startup) and adjust accordingly.
Does this method work for Linux ISO files too?
Yes, the diskpart + xcopy method works for most Linux distributions on Windows. On Mac, the dd command works seamlessly with Linux ISOs like Ubuntu, Fedora, or Debian.
